|
5.0 Front Disc Brake Upgrade
Parts List:
Rotors
Spindles
Calipers
Brake Pads
Brake Lines
Banjo Bolts/Washers
Wheel Bearings
Wheel Bearing Seals
5.0 Struts (or spacers/washers to use with 2.3 Struts)
Dust Caps
During this procedure
is a good time to install new struts and/or caster camber plates.
Using the 5.0 Master Cylinder optional. If you choose to use 73mm
SVO calipers and/or rear disc brakes then you should use the SVO/93
Cobra/94-97 GT or V6 MC and an adjustable proportioning valve.
Procedure:
1.
Raise the vehicle and support it with
jack stands. Don't put the stands under the A arms as you will
be jacking it up and down at these points. Remove the wheels.
2.
Spray all the nuts/bolts you
can see with PB Blaster or a similar penetrating fluid.
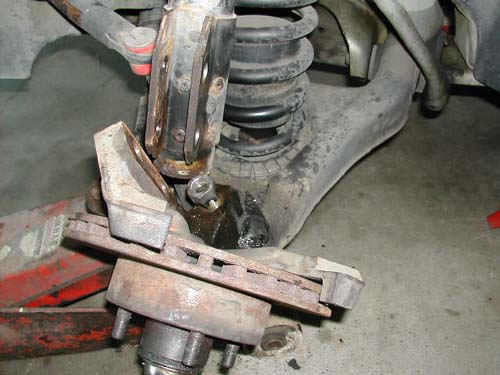
3. Remove the two
bolts that hold the brake caliper to the spindle and then remove the
caliper. You may want to break the brake line loose before pulling
the caliper off the rotor.
4.
Remove the brake line from
the caliper and plug the line (so it doesn't leak all over the floor).
5.
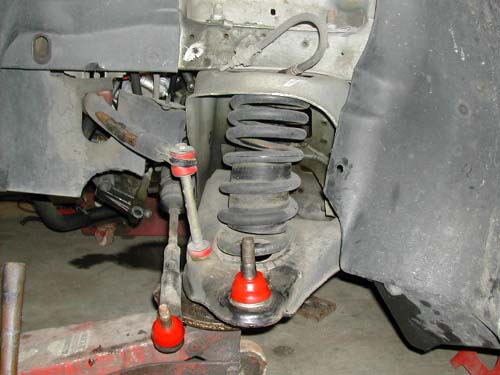
Remove the cotter pin from
the tie rod end and remove the castle nut. Install the nut upside
down (so the flat side is "up") and hit the tie rod with a hammer to
remove it from the spindle. The nut is installed upside down so you
don't hit directly on the threads and mushroom the end of the tie rod (see
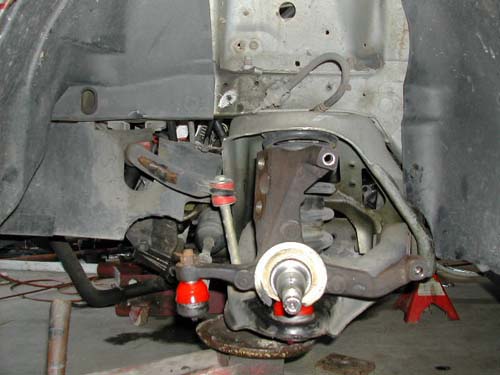
pic 4 for upside down nut on ball joint).
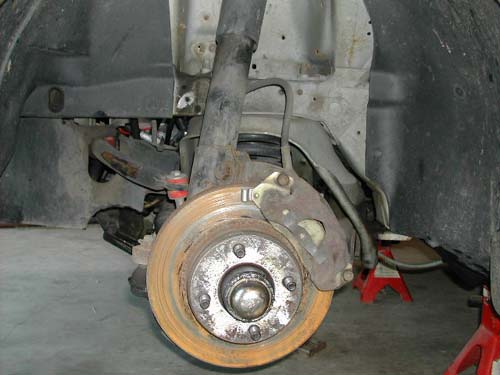
6.
Remove the lower strut bolts
and pull the spindle away from the strut.
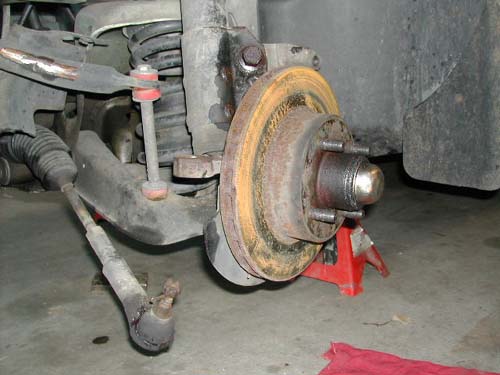
7.
Remove the cotter pin from
the ball joint castle nut and then remove the nut. Install it upside
down as shown below and hit if with a hammer (don't be a wimp). If
it doesn't come loose then you will need to get a ball joint removal tool
and use it.
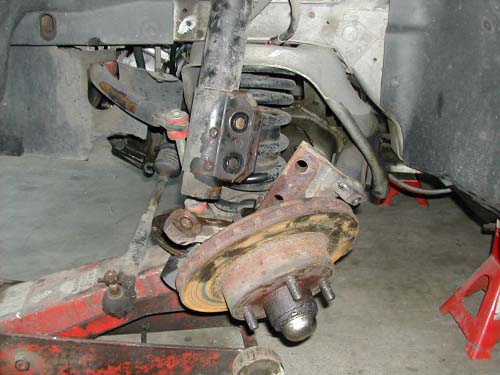
8.
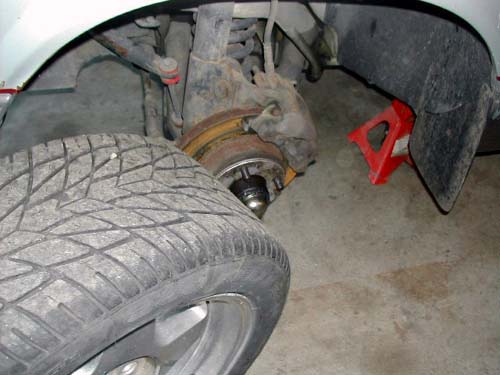
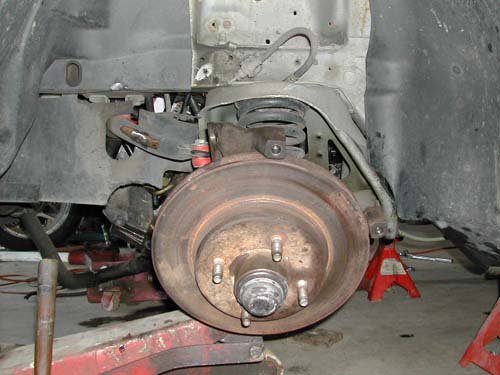
Once the ball joint is broke
loose from the spindle you can remove the spindle/rotor assembly as shown
below.
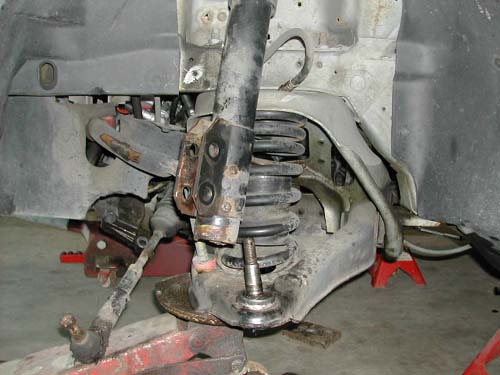
9.
Remove the upper strut nut
and remove the strut. It is easiest to remove the strut nut with an
impact. If one is not available you will need to use a wrench as a
large screwdriver.
10.
Install new ball joint and
tie rod boots. I would suggest cleaning off the ball joints and tie
rod ends and then filling the new boots with grease before slipping them
on. You can pick up the poly boots (much better than the stock
rubber units) from Summit Racing for less than 10 bucks. Right now
would also be a good time to install new sway bar end links/bushings (also
available from Summit).
11.
Set the 5.0 spindle in place
and install the tie rod and torque the castle nuts/cotter pin. Do
the same for the ball joint.
12.
Pack the new wheel bearings
with grease and install them the rotor. Install the seal as well.
Clean the spindle/bearings surface off and cover it with grease.
Install the rotor/bearing assembly, washer, and hand tight. Torque
it down 1 turn, spin the rotor, loosen 1/2 turn and check for side to side
play. It should be minimal and the rotor should spin free.
Install the nut cap, cotter pin, and then the dust cap.
13.
Remove the old break line at
the body mount where the rubber and steel lines meet. Pay attention
to how it comes apart. It's a bit tricky to remove.
14.
Install the new 5.0 brake
line and plug it (so it doesn't leak again).
15.
Install the brake pads in
the caliper and then bolt the caliper to the spindle. Then torque
the brake lines into the calipers (using banjo bolts/washers).
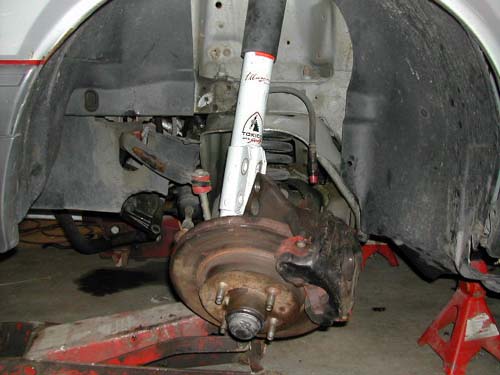
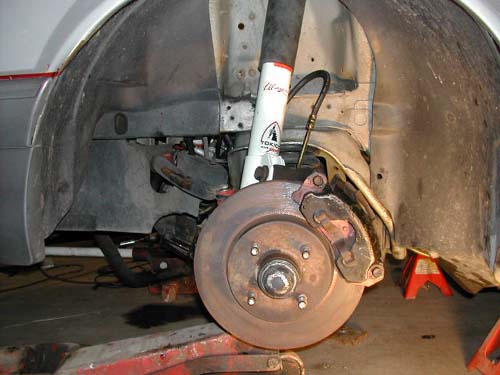
16.
Install the strut and
tighten the upper strut nut. Slide the spindle into the strut and
install the lower bolts.
17.
Make sure everything is
tightened down. Install the wheel/tire.
18.
Repeat the process on the
other side.
19.
Once both sides are complete
then you will need to bleed the brakes. Always start with the tire
farthest from the master cylinder. You will then need to align the
front end. The tires will most likely have 2+ inches of toe out.
If you have to drive it somewhere to get it aligned then I would suggest
you do it at home first to get it close before leaving.
If you have any questions about any of these procedures feel free to
contact us
HERE
©
Stinger Performance Engineering 2016 |